I love the Lord and my big crazy family. My husband and I have been together for 44 years.
I am a mother of two grown children and a grandmother to four biological grandchildren and 5 others. Many sites have been sold or did upgrades which messed up back links, if you find a broken link let me know and I will fix it.I have written online articles for Bubblews, Seekyt, TopicSpotter and Triond. You may still find some of my articles on Ehow/Demand Studio.
This summer after having an abundance of zucchini and
yellow squash; and using them in every conceivable way. I looked in my moms recipe box and found my aunt's zucchini pie recipe and adapted it to make Gluten-Free Sweet Yellow Squash Custard.
Eating gluten-free can be a tad challenging but not impossible. I hadn't found a gluten-free pie crust and I really did not need any extra calories, therefore, I decided baking it in glass baking dish was a much better idea.
Using Blue Diamond vanilla almond cashew milk instead of vanilla extract and Mil-not was another change. If I were making it for my niece I would have used coconut oil instead of butter too. Do not be afraid to play with recipes.
Ingredients for Gluten-Free Sweet Yellow Squash Custard
2 Cups yellow squash; cooked peeling seeds and all
1 1/2-2 Cups Sugar
2 Eggs
2 Cups vanilla almond cashew milk
4 tbsp Tapioca flour
3 tbsp butter or coconut oil
Instructions on making Gluten-Free Sweet Yellow Squash Custard
After cooking the squash, drain the excess water, and pour it in a blender. Mix it until a nice smooth consistency.
Add the rest of the ingredients and continue to blend it all together.
Pour into a 9-in X 13-in baking dish and sprinkle with cinnamon.
Bake at 450 degrees for 10 minutes, reduce the temperature to 350 degrees and bake for an additional 20 minutes or until the center is done and does not jiggle.
Baking gluten-free was once something I only did for my sisters and nieces, however, after seeing an herbalist to help get healthier I was placed on a no peanut, wheat, rye, barley oat and corn diet. I am actually finding the no corn part to be the hardest as it is in everything, however, this recipe for gluten-free zucchini brownies is delicious and fits the bill.
Ingredients
for the Zucchini Brownies:
½ cup cacao powder
1 ½ teaspoons baking soda
1
teaspoon Himalayan salt
½ cup coconut oil/olive oil; your choice
1 ½ cups coconut sugar
2
teaspoons real vanilla
2 cups garden fresh zucchini; shredded
2 cups
all-purpose gluten-free flour; I prefer Bob Red Mills all-purpose gluten-free flour
3-5
tablespoons water; only if needed
1/2 cup
chopped walnuts; optional
Ingredients for the chocolate frosting:
3
tablespoons cocoa powder
¼ cup butter or coconut oil; melted
2 cups
powdered sugar
¼ cup almond or cashew milk
1 tablespoon vanilla
extract
Pinch of
salt
Instructions to make the Zucchini Brownie:
Preheat
your oven to 350 Degrees Fahrenheit. Using a 9-inch x13-inch glass baking
pan and spray it
with cooking spray.
In your mixing
bowl, (I do not believe in using more than one bowl); therefore, add the ingredients
in the order listed adding the water last to make a thicker batter. The water you use is determined by the moisture in your
zucchini. Do not add too much water
or it will be more like cake than a brownie. ***I made the Gluten-Free Zucchini Brownies without any added water.
Spread
the batter into the prepared pan and bake 25-30 minutes until the brownies
spring back when gently touched or a toothpick inserted into the center
comes out clean.
While
the brownie is baking, whip up the frosting. Spread the frosting on the
brownies after they have cooled a little. I prefer to frost the brownies
while slightly warm; however, you can do as you like and wait until they
are completely cooled.
Cut
into squares and watch the Gluten-Free zucchini brownies disappear.
The calendar tells us that April 9, 2016 is spring; however,
looking out the window this morning, it looked as if winter had returned in
full force.
Not looking at the clock, I am trying to remember, approximately
1 pm or so the sky was blue, the snow had stopped and it looked as if all was
OK. I am glad I did not hold my breathe as only a short time later, the snow
had started falling hard once again. It did that several times throughout the
morning.
By 4 pm the sky was indeed blue, most of the snow melted,
even at a mere 30 degrees, and I was outside taking photographs of the lovely
spring flowers.
The hyacinths look and smell fantastic, however, the
daffodils little heads were drooping from the cold rain, ice/sleet and snow
they had endured this week. The still look lovely and I am hoping the sun that
is now shining and is to shine tomorrow will perk them up.
April 9th in Northern
Indiana has been quite interesting, how is the weather in your
neighborhood?
When researching
Easter bible passages, we also need to consider without the birth of Christ
there would be no Easter bible passages. Christmas and Easter go hand-in-hand.
We also need to
think about how we are saved by grace through faith. You can find that passage in Ephesians 2:8-10
Easter Bible Passages:
Now lets’ start
researching Easter passages, go back and start with the week before. We refer
to that Sunday as Palm Sunday. Why, because Jesus road on a young donkey into
the town as they took palm branches and hailed him King.
John
12:12-13 “The next day, the news that Jesus was on the way to Jerusalem swept
through the city. A huge crowd of Passover visitors took palm
branches and went down the road to meet him. They shouted, “Praise God! Bless
the one who comes in the name of the Lord! Hail to the King of Israel!””
Jesus Prays in Gethsemane
Now fast forward
one week and all had changed for Jesus the Christ. Jesus shared a meal and communion with his 12
disciples, commonly known as the Last Supper, after which Jesus went into the garden of Gethsemane to pray. Jesus being born of
a virgin and raised as a carpenters’ son, was fully aware he was born to die on
the cross for our sins; therefore, he chose to retreat to the garden to pray to
his heavenly father.
Matthew
26:36-46 Then Jesus brought them to an olive grove called Gethsemane, and he said, “Sit here while I go on
ahead to pray.”He took Peter and
Zebedee’s two sons, James and John, and he began to be filled with anguish
and deep distress. He told them, “My soul is crushed with grief to the
point of death. Stay here and watch with me.” He went on a little farther
and fell face down on the ground, praying, “My Father! If it is possible,
let this cup of suffering be taken away from me. Yet I want your will, not
mine.” Then he returned to the disciples and found them asleep. He said to
Peter, “Couldn’t you stay awake and watch with me even one hour?
Keep alert and pray. Otherwise temptation will overpower you. For
though the spirit is willing enough, the body is weak!” Again he left them
and prayed, “My Father! If this cup cannot be taken away until I drink it,
your will be done.” He returned to them again and found them
sleeping, for they just couldn’t keep their eyes open. So he went
back to pray a third time, saying the same things again. Then he came to
the disciples and said, “Still sleeping? Still resting? Look, the time has
come. I, the Son of Man, am betrayed into the hands of sinners. Up,
let’s be going. See, my betrayer is here!”
Judas Iscariot,
one of the 12 disciples, betrayed Jesus in the garden. Not only did he betray
Jesus for 30 pieces of silver, he did it in a prearranged way to the Jewish
officials. In order for them to make the arrest of the right man, Judas did it
by giving Jesus a kiss.
You can read this
story in Matthew 26:46-49
Jesus Arrested
After they arrested Jesus,
they tortured and beat him until he was unrecognizable.They spit in his face and even mocked with a
crown of thorns. Recorded in Isaiah 50:6, you can read where they even pulled
out his beard.
oMatthew 27: 29; NLT, They
made a crown of long, sharp thorns and put it on his head, and they placed a
stick in his right hand as a scepter. Then they knelt before him in mockery,
yelling, “Hail! King of the Jews!”
Easter Bible Passages
about The Death of Jesus:
If you have the impression Jesus, the son of God,
did not suffer, you are wrong. He suffered tremendously, he was the son of God
yet human just like you and I. The only difference was, he was perfect and he
never sinned, yet paid for our sins with his life.
oMatthew 27: 35-37; NLT, After they had nailed
him to the cross, the soldiers gambled for his clothes by throwing dice. Then
they sat around and kept guard as he hung there. A signboard was fastened
to the cross above Jesus’ head, announcing the charge against him. It read:
“This is Jesus, the King of the Jews.”
Yes, the Bible states they nailed Jesus to the cross;
the soldiers drove stakes into his hands and pierced his side.To Thomas, often known as doubting Thomas,
Jesus directly tells him to touch his hand and side to feel the wounds.
oJohn 20: 26-27 “Jesus was standing among them. He
said, “Peace be with you.” Then he said to Thomas, “Put your finger here and
see my hands. Put your hand into the wound in my side. Don’t be faithless any
longer. Believe!””
In John 19: 32-37 you can read where they told the
soldiers to break his legs, like the thieves, to speed up the death and pierced
his side. However, by not breaking his bones it fulfilled the prophecy in,
Psalms 34:19-20; KJV.
oIn Luke 23: 44-47 “It
was now about noon, and darkness came over the whole land until three in the
afternoon,for the sun stopped shining. And
the curtain of the temple was torn in two.Jesus
called out with a loud voice, “Father, into your hands I
commit my spirit.” When he had said this, he
breathed his last.The centurion, seeing what
had happened, praised God and said, “Surely this was a righteous man.”
Praise God the story does not end there; the tomb is
empty as Jesus rose from the dead and still lives today. He is the only reason
for the Easter Bible Passages: Saved by Grace through Faith.
Reducing stress in ones life is not an easy thing to do. With rising prices
on everything, especially the essential things in life, the money simply does
not go as far, which then, creates more stress. Therefore, it is one vicious
cycle, however, to avoid an eye stroke or a full stroke it is
a necessary thing to do.
For the last 2-years, I have experienced more stress as never before.
Unfortunately, my current stress was more than likely caused by a higher than
normal blood pressure induced by stress; however, this is just an opinion, as
the eye doctor did not know what caused the eye stroke and
further tests were ran.
After the eye doctors tests, I was sent to my
local general practitioner and from there to the hospital for tests. After the
Echo test determining my heart to be fine, the carotid arteries in my neck were
scanned for blockage. Again, everything looked OK, and still the confusion of
what caused the eye stroke remained unanswered.
Do not be Anxious
I went to the eye doctor in the middle of May with a clean bill of health, 3
weeks later my left eye started acting up, however, not having any major health
issues I thought it was just the he allergies in my eyes flaring up.
After hearing the news about having suffered an eye stroke,
which has lead to loss of peripheral vision in my left eye, I was more upset
and stressed than ever. Our daughter reminded me about the passage in
Philippians.
Philippians 4:6-7; (NIV) “Do not be anxious about anything, but in every
situation, by prayer and petition, with thanksgiving, present your requests to
God. And the peace of God, which transcends all understanding, will guard your
hearts and your minds in Christ Jesus.”
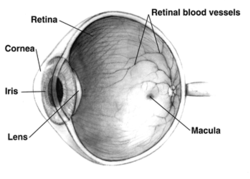
What is an Eye Stroke
I could attempt to describe what a stoke to the eye is, however, it was
easier to search Bing than to try to remember what the eye doctor and general
practitioner had explained to me while I was stressed out.
According to diseasesymptomdiagnosis.com, “An Eye Stroke,
is an ischemia of the anterior optic neuropathy, it’s a detrimental state in
which the blood supply either becomes reduced or blocked to the membranes of
the front position of the optic nerve. If the occlusion occurs as the blood
vessel comes forward of the optic nerve and on the retina, it is termed as
branch or central retinal artery blockage.”
In my case, the artery to the retina, which provides the blood supply,
collapsed, therefore, the loss of peripheral vision in my left eye. Nearly two
years later there are days when the vision is worse than other days. The
pressure from reading or writing too long creating issues.
Conclusion
Therefore, reduce the stress in your life so you do not suffer the same
consequences, an eye stroke or any vision complications is
something you do not want to experience first hand. Instead of the prescribed
cholesterol medication, which created more issues for me, I take Red Rice Yeast
and a low-dose aspirin; however, heed your doctor’s advice.
If you find yourself in a stressful job search out the herb St John Wort. It can be
found in stores such as Kmart or Wal-mart, you can purchase it from CVS or Walgreen,
online stores like Swanson Vitamins or even through Amazon.
****Originally posted on the Seekyt in 2015 after Tyler sold it to James and then the new cheating owners lost it and my profile in transferring over the site.
Toddler flower girl dresses can interpreted two ways, are
you looking for toddler flower girl dresses for a wedding or a lovely flower
print for your toddler?
If you are looking for toddler flower girl dresses for a
wedding, select one for a dress maker in your area, online stores, J.C.
Penny’s, Kohl’s or even Target, there is no need to spend a fortune. After you
have purchased your dress and the bridesmaid dresses, you can think about the
toddler flower girl dresses. You may want it patterned after the bride or you
may want the flower girl to look like a miniature bridesmaid. However, you may
choose to go a completely different direction using the colors of the wedding
to co-ordinate the dresses. Keep in mind this will be a toddler and should not
really look like a grown up. Dress her up in frills or ruffles but not a off
the shoulder or strapless number, you want to protect her innocence.
Material for toddler flower girl dresses:
Toddler flower girl dresses can be made of cotton, satin,
taffeta or even velvet if you are having a late fall or winter wedding. Just as
the flowers for a December wedding can be unique, so can the toddler flower
girl dresses. A beautiful deep red or maroon velvet dress would look lovely
while she's holding onto a basket of rose petals and tossing them down the
aisle. If you were already using those colors for the bridesmaid dresses at
Christmas time, using an opposing color of a dark green velvet dress would look
great too. If you are having a spring or summer wedding, the toddler flower
girl dresses may be more of a sundress style. There are no hard rules when it
comes to weddings; it is the brides’ day to do as she wishes.
Sundresses:
The best toddler flower girl dresses for the summer, are
sundresses. Toddlers are on the go and need to be comfortable. With flowered
sundresses, you can change the look for the toddler by slipping on a pair of
plain shorts or leggings. In the evening when the sun goes down and it might
get chilly for the toddler, slip on a pair of jeans.
Toddler flower girl dresses do not need to expensive to be
nice. With toddlers, think practical.
**Previously posted on Seekyt until they lost my profile and posts in the 2015 changeover.
How to garden strawberries is not a hard task although it
does take planning as typically they will not produce many berries, if any, the
first year. Therefore, start your strawberry garden now.
“Not only are strawberries juicy and delicious, they also
may lower blood levels of C-reactive protein (CRP), a signal of inflammation in
the body. High CRP levels are associated with an increased risk of heart
disease and stroke, and levels often spike when people with rheumatoid
arthritis or lupus have a flare, as well,” according to arthritistoday.org
In a how to garden strawberries: a tutorial, the first place
to start is deciding what variety of strawberries you want to plant in the
strawberry bed. Do you want a Junebearer strawberry or an Everbearer
strawberry? A June bearing strawberry is a variety that produces for a couple
of weeks a year and then they are done. An Everbearer strawberry is what it
says, starts producing as the Junebearer, however, they continue to produce
berries and the size start out large and then have a steady crop until fall.
The weather on both berries plays a big part of the sweetness and or the crop
yield.
Stark Bros featured product, Eversweet™ Strawberry,
according to Starkbros.com, “Perfect for patio gardens. You'll enjoy sweet
treats from this everbearer the very first summer. And it keeps on producing,
even when temperatures exceed 80ºF--and you can keep picking into the fall.
Fruit is long, cone-shaped. Pkg. of 25 plants, $11.99 - Pkg 25”
Junebearer Varieties
Wendy-Zones 3-8
Earliglow-Zones 4-8
Annapolis-Zones 3-8
Cavendish-Zones 3-8
Honeoye-Zones 3-8
Jewel-Zones 4-8
Sparkle-Zones 3-8
Cabot-Zones 4-8
Everbearer Varieties
Seascape-Zones 4-8
Ozark Beauty-Zones 3-8
Ogallala-Zones 3-8
Fort Laramie-Zones 3-7
Tristar-Zones 4-8
Unlike Junebearers, Everbearer strawberries, with new plants
set out it is required that you plant them 12-inches-15-inches apart, snip off all
blossom clusters and cut off all runners as they form.
Depending on what the uses of the strawberries you are
planting in your strawberry garden, in this how to garden strawberries: a
tutorial it would be irresponsible not to mention that you need to do your
homework for your region, and purpose of the strawberries. Some strawberries are for commercial use, others for jam or
jellies, fresh eating freezing or canning.
Adults and kids are alike in the fact that they love
Valentine’s Day. You will be able to find heart shapes from crafts to
chocolate. As a child we gave valentine cards away, we even made some, however,
where did you store them? Of course, a heart shaped Valentine’s Day cardholder.
Hearts are fun to make and receive, so be creative, find that inner child
hiding inside you, make yourself a Valentine’s Day heart craft.
Supplies needed to make a Valentine's Day Heart Craft:
Brown grocery bag/heavy craft paper
Plain paper for heart pattern
Black marker
Paper punch
Yarn or ribbon
Glue
Heart shapes of various sizes
Glitter
Newspaper
Instructions to make a Valentine's Day Heart Craft:
Step 1: Using a sheet of plain paper, draw a heart pattern
onto it to use. Cut it out.
Step 2: Lay the heart shaped pattern onto the brown grocery
bag or heavy craft paper. Trace the heart with a black marker.
Step 3: Cut though both layers of the grocery bag to get two
hearts.
Step 4: Using the hole punch, punch holes through both
layers in an even pattern all around the edge of the heart.
Step 5: Loop the yarn or
ribbon in the holes you punched. When you have threaded the yarn all the way
around; put a spot of glue on both sides to hold the ends of your yarn from
pulling out.
Step 6: Either drawing your own heart shapes from red
construction paper, or using a computer program make heart of different sizes.
Cut out your heart shapes and glue them on the heart cardholder.
Step 7: Spread the newspaper out for the messy part. Trace
the edges of the hearts with glue and sprinkle glitter on them. Shake off the
excess glitter onto the newspaper. Look to see if there are any bare spots that
need touched up with a little extra glue and glitter.
Step 8: Making heart shaped Valentine’s Day cardholders are
fun and easy. Be creative and make one for yourself, child or grandchild. If
you want extra fun, actually make a heart cardholder with your child or
grandchild.
Constructing cheap
homemade Easter baskets while recycling and saving is quite simple. Most
families have plastic milk or orange juice jugs, coffee cans and cardboard
shoe boxes or other usable boxes. With these three items, designing cheap
homemade Easter baskets is a success.
Once you decided you want to make an Easter basket, start by
looking in the recycling bin to see what you have to use. After all, holiday
fun for the children does not mean you have to break the budget.
Supplies needed to make cheap homemade Easter baskets:
1 Plastic
gallon milk or orange juice jugs
Bunny;
paper design of choice
Glitter
Glue
Marker
Scissors
6-8 Cotton
balls
1 Coffee
can
Paper
designed wrap; of choice
2 Pipe
cleaners
Instructions for making a cheap homemade Easter baskets: the
bunny design
Wash
your container removing any labels and residue, ensuring your paper design
will stick.
Draw
on construction paper, or use the computer to print out a bunny design to
fit the gallon milk jug or orange juice jug. This can be a whole bunny or
just the face.
Using the
glue and glitter, spice up your bunny’s whiskers or out line the ears.
Mark
the area on the top of the plastic jug where you want to make your cut.
Using the scissors punch a hole and cut the top of the jug off making the
opening for the candy.
Cut
out the bunny design and glue it on the front of the plastic jug letting
the ears extend the opening.
Spread
a spot of glue on the back of the jug, below the handle, and attach the
cotton balls for the fluffy bunny tail.
The
cheap homemade Easter bunny basket is now ready to fill with green plastic
grass and candy.
Instructions for making a cheap homemade Easter basket:
Veggie Tale Coffee Can
Find an empty coffee can.
Cut construction paper to fit around the
can and tape it together.
Poke holes on the sides of the coffee
can and twist together two pipe cleaners to make the handle.
Cut and glue on the pictures of desired
themed characters and sayings.
Put in a piece of tissue paper to pad the
bottom, you can shred to make look like grass if desired.
If your son, daughter and grandchildren are a big fan of
Thomas the Train, you can use a shoe box or other cardboard box to make a cheap
homemade Easter basket your child will want to keep past the Easter season. You
can find the instructions on Mom on Dealz website.
Let your children or grandchildren help you with the design
and construction of your cheap homemade Easter baskets, they will have fun
while learning to recycle and save.
I love egg rolls, I have every since I worked in our
concession trailer and would be parked right next to an egg roll concession
trailer.
Our daughter went to school with their daughter so I bought theirs from them by
the case for a while. However, I soon learned I could save money by wrapping my
own egg rolls. You can use whatever meat you prefer, however, I eat a lot
chicken; therefore, I made chicken egg rolls. I will show you how you can make
your own egg rolls.
Ingredients to make chicken egg rolls:
1 Package
egg roll wrappers
Shredded
chicken
Shredded
cabbage
1 Egg;
beaten
Seasoning
of choice
Canola or
Olive Oil
Instructions to make chicken egg rolls:
1.Cook
your chicken and season it to taste. After it cools, shred it up in small
pieces.
2.Shred
your cabbage every fine. I often use my food processor however; you can do it
with a hand grater. The pieces just need to be very fine.
3.Take
the egg roll wrappers out and let warm up a bit, so they are easier to work
with.
4.Place
the egg roll wrapper on the counter top and lay it out looking like a diamond.
Put some cabbage in the middle.
5.Add
some chicken to the top of your cabbage; you are going to start to fold your
egg roll.
6.Take
the lower flap of wrapper and pull over the cabbage and chicken; next, take the
sides and fold in.
7.Start
rolling up making it as tight as possible but making sure not to poke a hole in
the wrapper.
8.Dip
your fingers into the beaten egg, put some on the wrap, and seal the egg roll.
9.Roll
up the whole package of egg roll wraps.
10.Make sure
your oil is hot before trying to fry your egg roll. The temperature of the oil
should be 375-400 degrees. Carefully place the egg roll in the oil and brown
first side. With the tongs, turn it over and fry the other side. You may have
to hold it as it will try to roll back.
11.Remove the chicken
egg roll from the oil and put it on paper towel to allow the excessive oil to drain
off.
We enjoy our chicken egg roll, made from scratch with soy sauce.
**previously posted on Seekyt before they lost my profile.